Bravo Swivel Shaft Cover Plate Instructions
This kit will only work on Bravo 1, Bravo 2, Bravo 3, and Alpha 1 Gen 2 Only.
Warning!! This repair should be made by a marine mechanic! Read entire instructions before starting this repair!!!
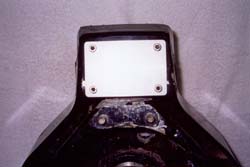
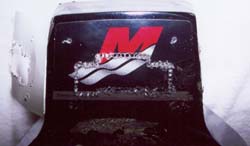
Part #2501- Bravo Swivel Shaft Cover Plate
List $61.50 EA
Tools and supplies you will need:
- Die Grinder w/1/8 holder
- Cordless or Electric Drill
- Center Punch
- Hammer
- Scotch Tape
- Scissors
- 1/4-28 Tap
- Tap Holder
- Silicone
Cover Shaft Kit includes:
- S.S. Cover Plate
- Gasket
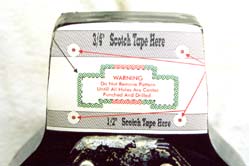
- Cut Out Drill Pattern
- (4) S.S. 1/4-28 x 3/8 Socket Head Cap Screws
- 1/8 Die Grinding Arbor
- (2) Cut-Off Disks
- (2) 3/32 Drills
- (1) #3 Drill For Tap Hole
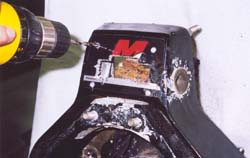
1. Cut drill template out on solid black line as close as possible.
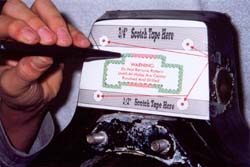
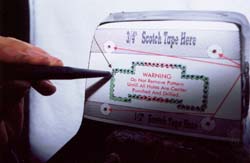
2. Place pattern on Gimbal, lining bottom edge of pattern with bottom flat edge of Gimbal Housing, centering template from right to left and scotch tape pattern to housing. Do not remove this pattern until all holes are center punched, drilled and window is removed!!!
3. Using center punch, center punch each red and green circle around the opening to be cut out and the 4 bolt hole locations. Center punch as close to the center of the X as possible.
4. Using a 3/32 drill, drill all 4 tap bolt holes first 7/16" deep maximum.
5. Using a 3/32 drill, drill all green holes in window pattern first, drilling just deep enough to break through.
6. Using a 3/32 drill, finish drilling cutout in the red drill holes being very careful not to break the drill. If drill breaks, go on to the next hole with a new drill, (2) 3/32 drills are supplied.
7. Using a #3 drill supplied, drill out the 4 bolt holes. This is the size of drill for a 1/4-28 tap. Only drill 7/16" depth maximum!!!
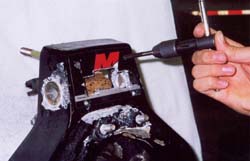
8. Using a die grinder, insert the 1/8 arbor (supplied in kit). Install one of the 2 cutting disks and tighten with a screwdriver.
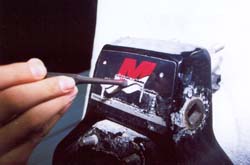
9. Carefully cut out window pattern with die grinder cutting through all of the 3/32 holes. Cut through all green holes first and red holes last. Do not slip and cut outside of window pattern!! This must be done carefully so that gasket and plate will seal on final assembly!! You may need a small hammer & punch to tap out window opening. Once removed, you can use a die grinder or file to clean up all ragged edges of opening.
10. Now that window opening is removed, remove drill template from Gimbal Housing.
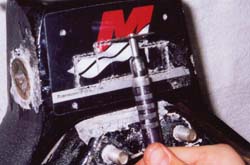
11. Using a 1/4-28 tap in a hand tap holder, apply a small amount of oil in each hole and on tap. Tap the 4 stainless plate bolt holes. Be sure to tap holes straight, cleaning the tap after each hole. After tapping, clean out holes. Then screw the 1/4-28 socket head cap screw into each hole to be sure hole has been tapped deep enough. (Screw should be able to go all the way in the tapped hole). If hole is not tapped deep enough, re-drill hole with #3 drill and re-tap to depth required.
12. Using wrench Kit Part #2501, loosen tiller arm bolt & nut.
Note: Wrenches in Wrench Kit have been altered to allow easy access of tightening and loosening tiller arm bolt and swivel shaft nut.
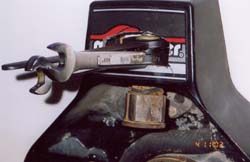
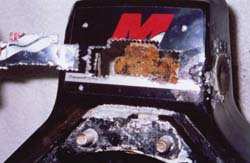
13. Remove swivel shaft. Replace bushings and seal, re-install Gimbal Ring with new JR Marine High Performance Swivel Shaft and tighten to OEM specifications. (JR Marine also carries seals and bushings).
14. What is left of OEM sticker on Gimbal Housing does not have to be removed. This is an option left up to the installer. Note: Sticker is very hard to get off. Cover and gasket will seal over top of sticker. Clean surface thoroughly with lacquer thinner at this time before mounting gasket & cover plate. Using silicone, apply a dab of silicone in each of the (4) 1/4-28 bolt holes. With your finger, smear a nice even coat of silicone over gasket area only. (Do not lay a bead of silicone on gasket area. You must put an even coat on surface.) Place gasket and stainless steel plate on Gimbal and tighten down evenly with 4 screws supplied until tight (45 inch pounds of torque max). Silicone will squeeze out from under gasket. You may not see silicone come out when tightened. Don't worry, housing is sealed. After silicone has fully set up approximately 24 hours, trimming of gasket with razor blade is optional. We do not recommend trimming gasket, as it increases the possibility of leakage.
15 You may call JR Marine for questions or technical assistance. If you get an answering machine and can't wait for a return call, you can call Ron Bender on his cell phone at 216-390-1330. He will be glad to assist you in any questions you may have or go to jrmarine.com and click on install instructions. We have photo's and steps to assist you.